Integrate Calendly with your one page site - to collect appointments & bookings

If you’re running events, online sessions or consulting - adding appointment booking & scheduling is the biggest challenge. With Calendly, you can manage that without any hassle.
What is Calendly?
Calendly is a simple solution for automating bookings on your website. Calendly puts your entire meeting workflow on autopilot, sending everything from reminder emails to thank you notes, so you can focus on the work only you can do.
With Embed, you can let customers and prospects schedule an appointment from any page on your site, without the need to develop a scheduling solution.
Getting Started
- Create an account with Calendly
- Connect your Google account
- Grant permission for Calendly to access your calendar
- Create your Calendly URL. We recommend using your business name
- Choose the days and times that you are available for bookings
- Select your role from Calendly’s list
Setting up Calendly Events
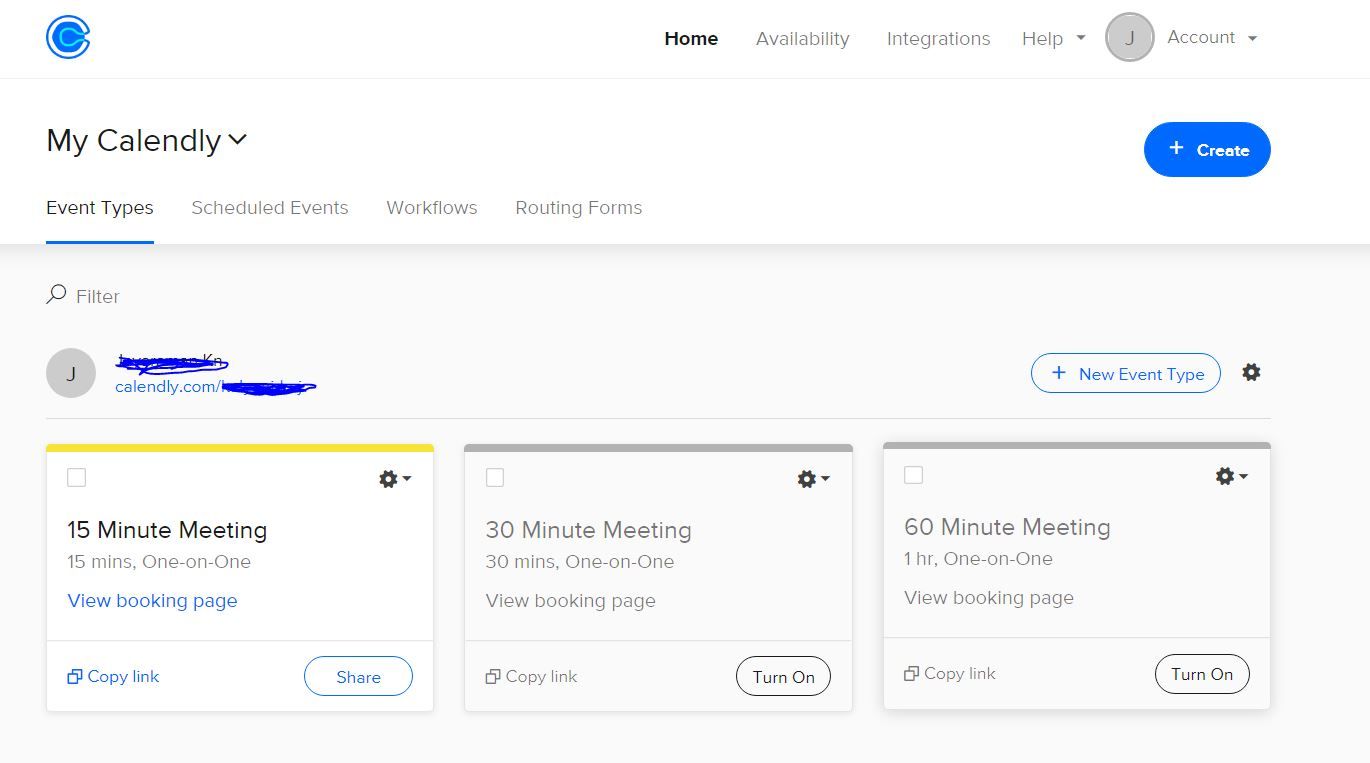
If you’re setting up calendly for the first time, you will see that there is a default event for a 15-minute meeting / 30-minute already in your dashboard. If this format works for you, it can be edited to your preferences by clicking the cog icon in the top right of the event and selecting Edit from the drop-down list. Also, you can create your own event type, by clicking on + New Event Type button
There are four type of events you can create
- One - to - One - Let an invitee pick a time to meet with you
- Group - Let multiple invitees meet with you at one time.
- Collective - Host an event with another person and let invitees pick a time when you’re all available.
- Round Robin - Create an event that cycles between multiple hosts.
You can create any of one these event types to get started.
Charging Bookings through Calendly

Also you can even charge for your bookings through Calendly, you can integrate either Stripe or PayPal as Payment Gateways for your calendar. To do this, click the Collect Payments menu once you edit the event and select your preferred payment gateway from their list. You will then be guided through the setup process. Please note that this is a premium feature available on the Calendly Professional plan.
How to Embed Calendly on Your Gridbox One Page Website?
Once you have created your calendar and customized it to your preferences, you’ll need to then display it on your one page website so your clients can start booking through it. This is done through an embed that you can add to your page.
There are three different ways to embed a Calendly to your website
- Simple link
- Inline
- Popup Text
- Popup Widget
To simply link a Calendly Page
- Login to your Gridbox Account
- Start with blank site or use an existing one page website template
- Click on Add Block
- Under Basic -> Drag and Drop link button
- Click on the Setting Icon
- This will open the panel on the left
- Click on Properties
- Under Link Type -> Choose URL
- Now copy the Calendly link and paste it here
- You’re done
To Embed Calendly your Gridbox site - do the following steps
- Login to your Gridbox Account
- Start with blank site or use an existing one page website template
- Click on Add Block
- Under Embed Code
- Drag and Drop the Embed block to anywhere on the canvas
Now go to your Calendly Dashboard
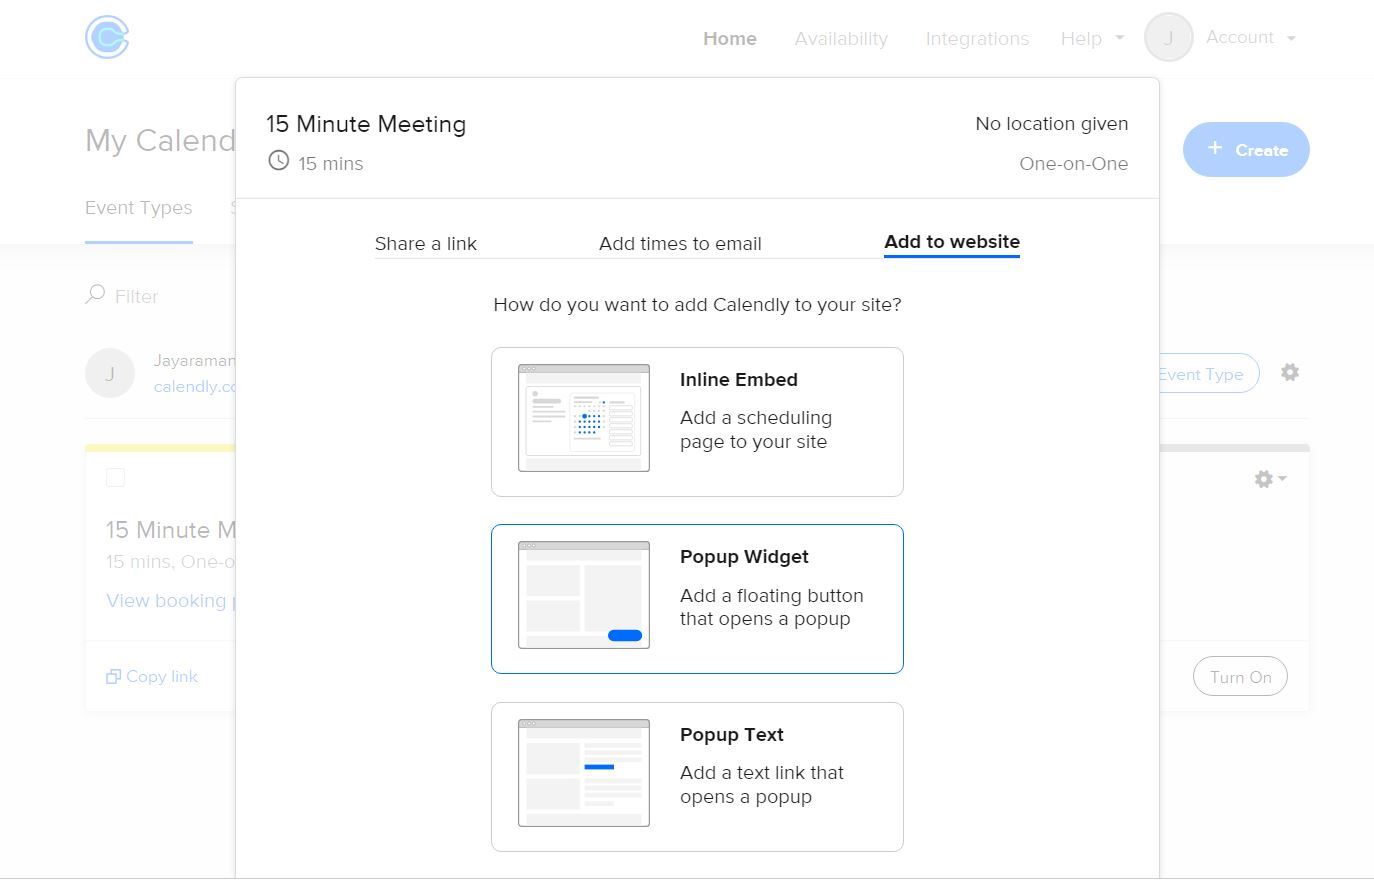
- From the Event you created
- Click on the Share button
- Under Add to Site Tab
- You can pick any three of these options (Inline Embed / Popup Widget / Popup Text)
- Click on continue
- Copy the Embed Code
- And paste it on the Embed Code in your Gridbox Builder
- Click on Save
- Now you can click on the Preview tab to see the changes.
- You’re done.
Useful Links
Hope you find this tutorial useful. If you’ve any questions please feel free to use the contact us page.